How to:
Build your own composter
Is your composter at home on it’s way out? Too small or too large? Well, this month we have a tutorial that may be able to help you out.
Chris, one of our experienced sponsorship winners has written a great article on how to make your very own composter to your specific requirements.
It goes without saying that compost is a valuable commodity in any garden. Poorly conditioned soil makes for unhappy plants and the lack of peat based products isn’t helping either.
This year I wanted to improve the quality and quantity of compost I make. I will specifically be using some of this for containers that I am planting up with a range of vegetables.
The ingredients
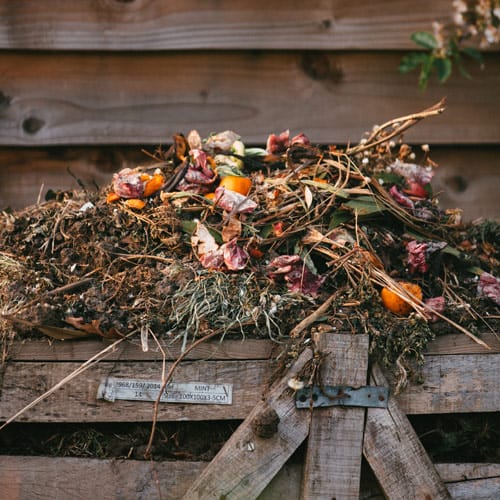
Each year I produce compost from mainly two sources of feedstock material. These are grass cuttings, and shredded hedge clippings (Holly, Lleylandii, Hawthorn and Yew). My preference when making compost is to use a double compost method. From experience, I find this gives the best results as it stops the grass cuttings becoming too slimy.
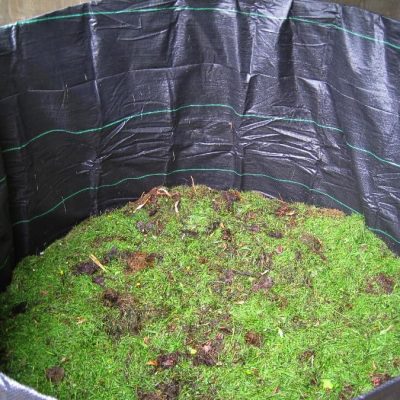
I use woody hedge trimmings, shredded in early spring, and then mix these with grass cuttings as they become available. This process happens over a few weeks with the mix being two parts grass cuttings to one part hedge trimmings. This fills a bin in quite a short space of time with the whole process is repeated over a further few weeks. Regular turning of the compost is essential, resulting in a crumbly lump free compost around twelve months later.
Making the Bins
For many years I have used pallets, but I find there are two main problems with them.
Firstly the compost dries out too quickly at the edges and a ‘standard’ pallet bin is just too small for the amount of material I have.
After some thought I had decided on how best to make a bin that would be quick to set up. However it also needs to be easy to access when the contents need to be turned or removed. Perhaps most importantly it also needed to resolve the issue of the dry spots I had experienced when using pallets.
One of my main concerns was how to avoid wood as it rots quite quickly. Having said that I didn’t want the expense of too many other building materials. A friend of mine was good enough to give me several 2.4 metre x 1.2 metre mesh panels. Being environmentally friendly and, in the interest of recycling, I decided to use these panels as my starting point.
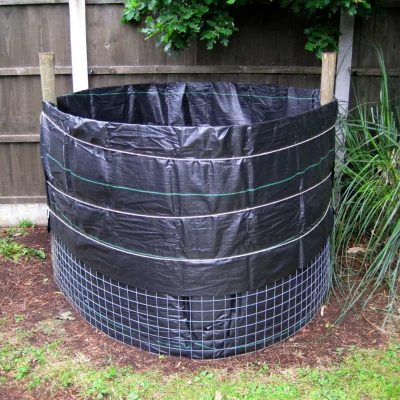
After trimming the panel height down to 1.1 meters I joined two panels together to create a round bin structure. The height of the panels is also important to ensure I could easily reach the bottom of the bin with a fork. This created a capacity that will hold around 2 cubic metres, which could easily hold the required volume for a year’s production.
Getting things in place
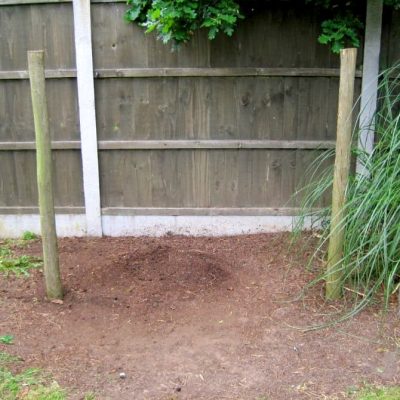
My first job after doing some schoolboy mathematics was to mark out the site for the new bin. I hammered in place two fencing stakes with the outer edges being 156cm apart when measured across. I chose a heavy duty landscaping membrane for the outer lining of the bin.
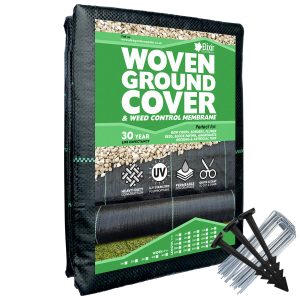
From the 2m x 25m pack of Elixir Gardens groundcover membrane I cut a double thickness length which was about 150mm longer than the wire mesh panels. Then, using a hot air paint stripper I ran it along the raw edges to stop them from fraying.
My next job was to file off the sharp edges from where the panel was trimmed before attaching it to the stakes with fencing staples. I repeated this same process for the front mesh panel, except I only secured one side using the staples. The other side is secured using screws and washers to enable the panel to be swung open on the ‘staple’ hinges.
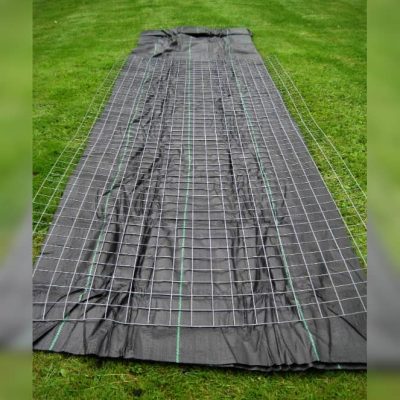
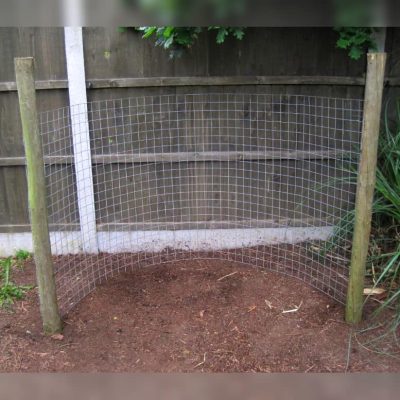
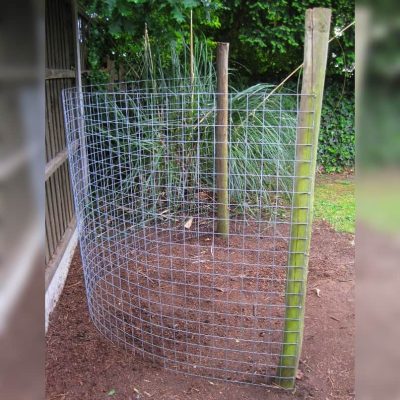
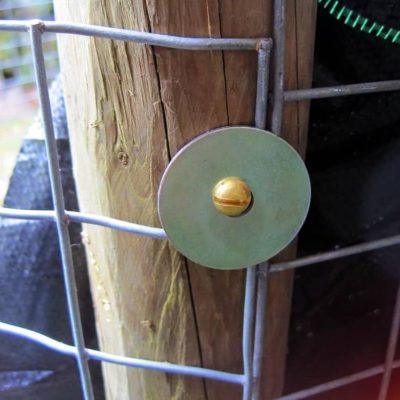
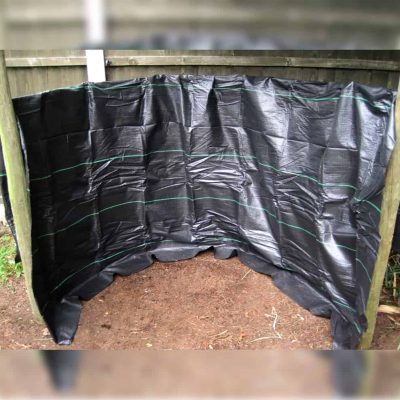
To complete the bin I then draped the ground cover over the mesh leaving a about 100mm to overlap onto the ground.
This allows the weight of the contents to help anchor the fabric to the ground. The last job was to wrap some heavy duty twine around the outside to help secure the membrane.
I did make sure to apply a little pressure to compress the mesh whilst I was tying it. From my experience this helps to tension the twine once the pressure is released.
Finishing Touches
This whole project has taken me just under two hours to make from start to finish. I particularly like the fact that this compost bin can be easily taken down and reassembled anywhere in the garden.
For me, the huge capacity is a big plus point as this will help generate plenty of heat, and be more effective at producing compost. As it is open to the ground it will enable worms to easily colonise the bins contents and further enrich the compost.
Within minutes of completing the bin I had it part filled and I cant wait to see the results in a few months.

I’m based in Shropshire, and I’ve been a keen gardener since childhood. Throughout my career I have raised plants commercially, landscaped gardens, taught horticulture, built the odd show garden and managed public parks where I helped popularise the use of wildflowers. My passion has always remained with growing fruit and vegetables in my own garden and looking after my rare breed chickens.
Chris
Copy the code below for your 10% off discount:
ELIXIR10

It goes without saying that compost is a valuable commodity in any garden. Poorly conditioned soil makes for unhappy plants and the lack of peat based products isn’t helping either.
This year I wanted to improve the quality and quantity of compost I make. I will specifically be using some of this for containers that I am planting up with a range of vegetables.
The ingredients
Each year I produce compost from mainly two sources of feedstock material. These are grass cuttings, and shredded hedge clippings (Holly, Lleylandii, Hawthorn and Yew). My preference when making compost is to use a double compost method. From experience, I find this gives the best results as it stops the grass cuttings becoming too slimy.
I use woody hedge trimmings, shredded in early spring, and then mix these with grass cuttings as they become available. This process happens over a few weeks with the mix being two parts grass cuttings to one part hedge trimmings. This fills a bin in quite a short space of time with the whole process is repeated over a further few weeks. Regular turning of the compost is essential, resulting in a crumbly lump free compost around twelve months later.


Making the Bins
For many years I have used pallets, but I find there are two main problems with them.
Firstly the compost dries out too quickly at the edges and a ‘standard’ pallet bin is just too small for the amount of material I have.
After some thought I had decided on how best to make a bin that would be quick to set up. However it also needs to be easy to access when the contents need to be turned or removed. Perhaps most importantly it also needed to resolve the issue of the dry spots I had experienced when using pallets.
One of my main concerns was how to avoid wood as it rots quite quickly. Having said that I didn’t want the expense of too many other building materials. A friend of mine was good enough to give me several 2.4 metre x 1.2 metre mesh panels. Being environmentally friendly and, in the interest of recycling, I decided to use these panels as my starting point.
After trimming the panel height down to 1.1 meters I joined two panels together to create a round bin structure. The height of the panels is also important to ensure I could easily reach the bottom of the bin with a fork. This created a capacity that will hold around 2 cubic metres, which could easily hold the required volume for a year’s production.
Getting things in place
My first job after doing some schoolboy mathematics was to mark out the site for the new bin. I hammered in place two fencing stakes with the outer edges being 156cm apart when measured across. I chose a heavy duty landscaping membrane for the outer lining of the bin.
From the 2m x 25m pack of Elixir Gardens groundcover membrane I cut a double thickness length which was about 150mm longer than the wire mesh panels. Then, using a hot air paint stripper I ran it along the raw edges to stop them from fraying.
My next job was to file off the sharp edges from where the panel was trimmed before attaching it to the stakes with fencing staples. I repeated this same process for the front mesh panel, except I only secured one side using the staples. The other side is secured using screws and washers to enable the panel to be swung open on the ‘staple’ hinges.


To complete the bin I then draped the ground cover over the mesh leaving a about 100mm to overlap onto the ground.
This allows the weight of the contents to help anchor the fabric to the ground. The last job was to wrap some heavy duty twine around the outside to help secure the membrane.
I did make sure to apply a little pressure to compress the mesh whilst I was tying it. From my experience this helps to tension the twine once the pressure is released.
Finishing Touches
This whole project has taken me just under two hours to make from start to finish. I particularly like the fact that this compost bin can be easily taken down and reassembled anywhere in the garden.
For me, the huge capacity is a big plus point as this will help generate plenty of heat, and be more effective at producing compost. As it is open to the ground it will enable worms to easily colonise the bins contents and further enrich the compost.
Within minutes of completing the bin I had it part filled and I cant wait to see the results in a few months.


I’m based in Shropshire, and I’ve been a keen gardener since childhood. Throughout my career I have raised plants commercially, landscaped gardens, taught horticulture, built the odd show garden and managed public parks where I helped popularise the use of wildflowers. My passion has always remained with growing fruit and vegetables in my own garden and looking after my rare breed chickens.
Chris
Copy the code below for your 10% off discount:
ELIXIR10

Share This Blog
Featured Products
-

Bamboo Garden Canes | Heavy-Duty Plant Support | 2ft – 10ft
£5.49 – £129.99 Select options This product has multiple variants. The options may be chosen on the product page -

Fish, Blood & Bone | Multi Purpose Organic Fertiliser / Plant Food | NPK 5-5-6 | 25kg treats 360sq.m when applied at 70gsm
£5.99 – £40.99 Select options This product has multiple variants. The options may be chosen on the product page -

Woven Ground Cover with Optional Pegs & Staples
£4.99 – £199.99 Select options This product has multiple variants. The options may be chosen on the product page -

Coir Organic Compost Blocks | Premium Peat-Free Growing Media | 10L &75L
£5.99 – £169.99 Select options This product has multiple variants. The options may be chosen on the product page -

Volcanic Rock Dust Organic Fertiliser | Soil Re-Mineraliser and Compost Activator
£5.99 – £34.99 Select options This product has multiple variants. The options may be chosen on the product page -

Seaweed Meal Fertiliser | 500g-20kg | Plant Feed, Lawn Conditioner & Soil Fertiliser
£6.99 – £99.99 Select options This product has multiple variants. The options may be chosen on the product page -

Bathgate Champions Blend 50L Bags – Multiple Quantities Available
£20.99 – £229.99 Select options This product has multiple variants. The options may be chosen on the product page -

EX4 General Purpose Premium Fertiliser | 5-7.5-10 + Trace Elements | Covers up to 750m² | 100g – 25kg Supplied in Bag or Tub
£5.99 – £63.99 Select options This product has multiple variants. The options may be chosen on the product page -

Wooden Tree Stakes/Plant Supports | 75cm & 135cm Sizes
£8.99 – £1,272.99 Select options This product has multiple variants. The options may be chosen on the product page

