How To Install A Tube Heater
Tube heaters are designed to provide steady background heat and frost protection in areas such as greenhouses, sheds, conservatories, workshops and airing cupboards.
Installing an Elixir tube heater is relatively straightforward, but it is important to follow the supplied instructions carefully. The heater must be installed horizontally using the mounting brackets supplied, and it must have adequate space around it to allow air to move freely.
This guide explains how to install an Elixir tube heater and the main points to check before switching it on.
Quick Answer
To install a tube heater:
- Choose a suitable location
- Make sure the heater will be installed horizontally
- Position the mounting brackets
- Fix the brackets securely
- Attach the tube heater to the brackets
- Check that there is adequate clearance around the heater
- Make sure the power cord does not touch the heater
- Check that the heater is securely mounted before switching it on
The exact installation should always follow the instructions supplied with your particular model.

What You Need
Before starting, make sure you have:
- Your Elixir tube heater
- The mounting brackets supplied with the heater
- A standard Phillips screwdriver where required
- A suitable mounting surface
- Access to an appropriate electrical socket
The TH0 and TH0-B product information states that the heaters are supplied with the parts required for assembly, with a standard Phillips screwdriver required for the initial construction.
Step 1 — Choose Where To Install The Heater
Choose a suitable location before fixing the brackets.
Elixir tube heaters can be used in a range of applications including:
- Greenhouses
- Garden sheds
- Conservatories
- Airing cupboards
- Workshops
- Garages
- Caravans
- Other suitable enclosed areas
The heater should be positioned where there is free movement of air around the unit. It must not be covered, as this can cause overheating.
The supplied TH0 manual also states that the heater should be positioned horizontally using the mounting brackets supplied.
Step 2 — Check The Clearances
Clearance around the heater is important.
The installation diagrams supplied with the TH0-D instructions show a minimum 30mm clearance for floor mounting and a minimum 30mm clearance from the floor with wall mounting, together with a 200mm minimum clearance above the heater for wall mounting.
Do not switch the heater on until it has been securely mounted.

Step 3 — Install The Mounting Brackets
Position the mounting brackets where the heater will be installed.
The supplied instructions show the brackets being fixed first, followed by the tube heater being secured to them.
For the standard TH0 models, the manual describes:
Step 1: Install the bracket.
Step 2: Fix the tubular heater to the wall or floor using the brackets.
The TH0-B instructions also show the heater being mounted using the supplied brackets and specifically state that vertical installation is prohibited.
Step 4 — Attach The Tube Heater
Once the brackets are securely fixed, position the tube heater into them.
Check that:
- The heater is horizontal
- The heater is securely supported
- The brackets are properly fixed
- Nothing is resting against the heater
- There is sufficient space around the heater
- The power cord cannot touch the tube
Do not switch the heater on until it is securely mounted.
Step 5 — Connect The Power
Once installation is complete, connect the power cord as instructed for your model.
The TH0 manual states that the power cord should be pushed fully into the power socket in the heater when in operation. If the cord is damaged, stop using the product and contact the manufacturer.
The heaters use a standard UK electrical supply of 220–240V, 50Hz.
Step 6 — Set The Heater
The standard TH0 and TH0-B heaters have built-in adjustable temperature control.
To operate the thermostat on the TH0 manual:
- Switch the heater on.
- Turn the thermostat clockwise towards the maximum setting.
- Allow the area to reach the desired temperature.
- Turn the thermostat anti-clockwise until you hear a click.
- Stop turning at this point.
The thermostat will then regulate the temperature.
The TH0 range has an adjustable temperature range of 0°C–85°C.
Installing A Tube Heater With A Digital Timer
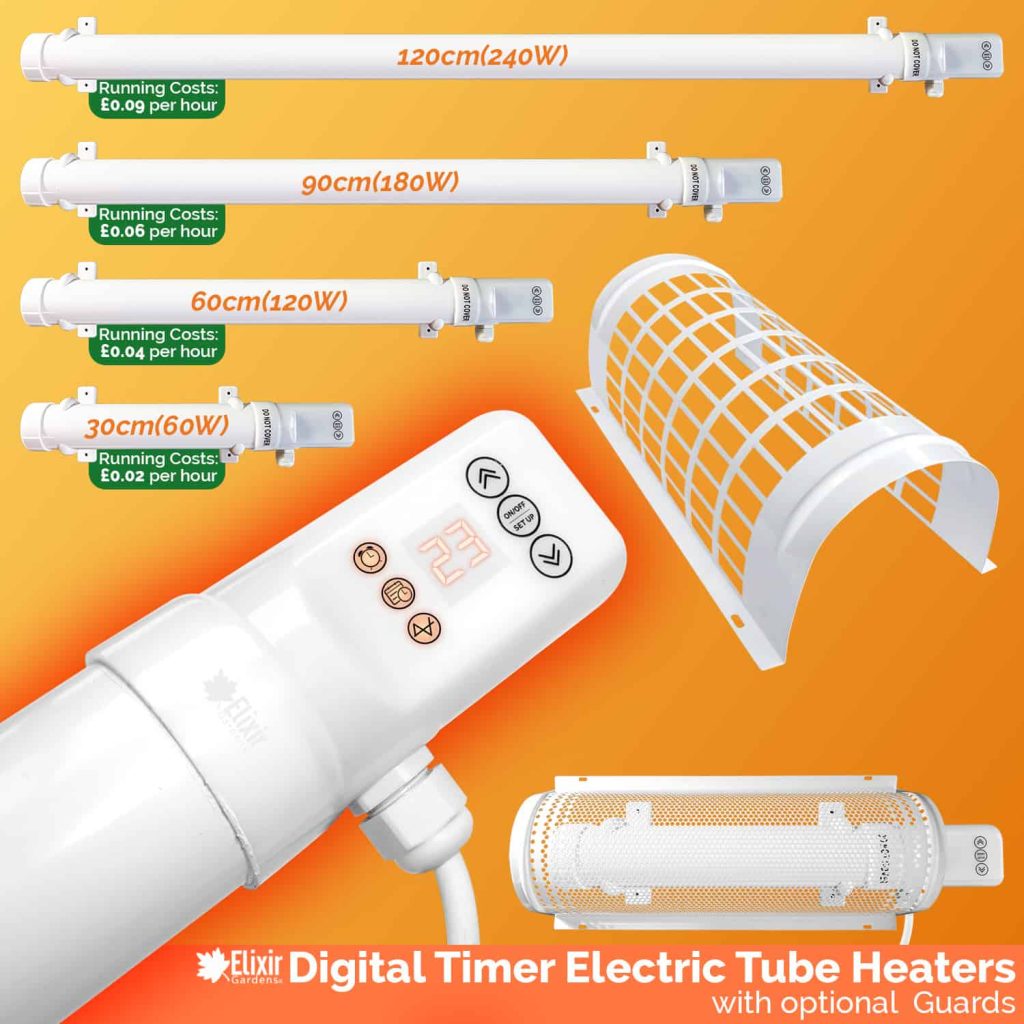
If you want timed operation, Elixir also supplies the TH0-D Tube Heater with Digital Timer.
These heaters are available in 30cm/60W, 60cm/120W, 90cm/180W and 120cm/240W versions, with optional guards available.
The same basic installation principles apply:
- Install the heater horizontally
- Use the supplied mounting brackets
- Ensure it is securely mounted
- Maintain the required clearance
- Allow free movement of air
- Do not cover the heater
- Do not switch it on until installation is complete
The digital timer allows the heater to be programmed to come on and off when required.

Common Mistakes to Avoid
- Installing the heater vertically, Elixir’s instructions require the heater to be installed horizontally
- Switching it on before mounting it securely, The instructions state that the heater should not be powered until it is securely mounted
- Covering the heater, The heater needs free movement of air around it. Covering it can cause overheating
- Placing objects against the heater, The surface becomes extremely hot, so combustible or flammable objects must not come into contact with it
- Allowing the power cord to touch the heater, Keep the cord away from the hot surface
- Ignoring the required clearance, Follow the clearances shown in the installation instructions for your particular model
- Treating an IP44 heater as waterproof, The TH0 manual states that the heater is water resistant but not waterproof and should not be used where continuous or excessive water spraying can occur
- Using a damaged power cord, Stop using the heater if the cord is damaged and contact the manufacturer for further instructions
TH0 Tube Heaters
Best For: Steady background heat and frost protection in areas such as greenhouses, sheds, conservatories and airing cupboards.
Why Choose This Product: The TH0 range has built-in adjustable temperature control, an indicator light, steel construction and an IP44 rating.
Recommended When: You want a straightforward tube heater with built-in temperature control.

TH0-B Tube Heaters
TH0-B Tube Heaters
Best For: Applications requiring a compact tube heater with built-in heat control.
Why Choose This Product: The TH0-B range is available in 30cm, 60cm, 90cm and 120cm options, with built-in temperature control, an indicator light and IP44 rating.
Recommended When: You need a different tube length or wattage to suit your installation.

TH0-D Tube Heaters With Digital Timer
Best For: Situations where you want to control when the tube heater switches on and off.
Why Choose This Product: The TH0-D range includes a digital timer and is available in four sizes, with optional heater guards.
Recommended When: You want timed operation rather than simply switching the heater on and off manually.
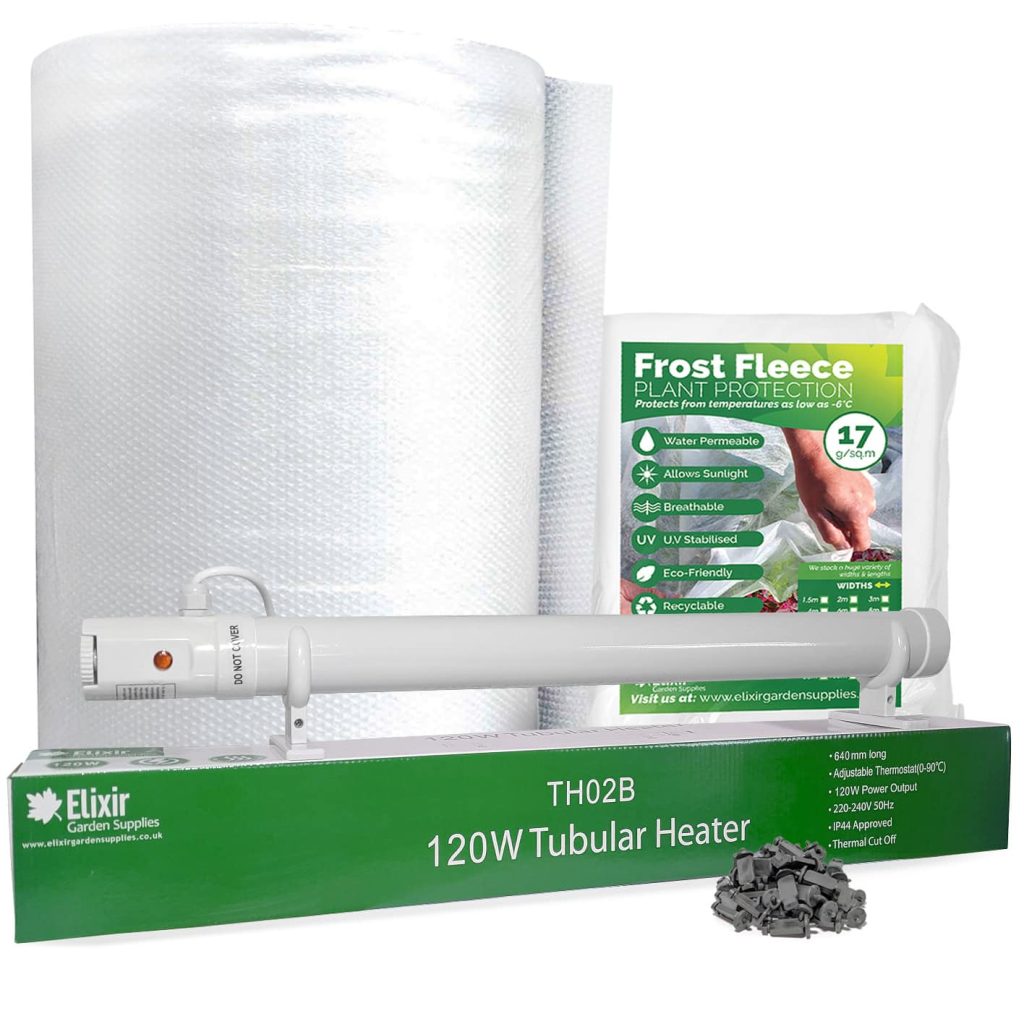
Greenhouse Frost Protection Kit
Best For:
Our Frost Protection Kit is best for Gardeners who want a complete solution for protecting greenhouse plants from cold temperatures and frost during the colder months.
Why Choose This Product:
The Greenhouse Frost Protection Kit combines tube heating with greenhouse insulation and frost fleece, helping to reduce heat loss while providing additional background warmth. It offers a convenient way to bring several elements of greenhouse winter protection together in one kit.
Recommended When:
Choose this kit when preparing a greenhouse for autumn and winter, particularly when the aim is to maintain above-freezing temperatures and protect plants from frost. It is especially useful when combined heating and insulation are preferred over purchasing individual components separately. Always follow the product instructions for installation and use.
Summary
Installing a tube heater is straightforward when the correct mounting procedure is followed.
The key points are to install the heater horizontally, use the supplied mounting brackets, maintain the required clearance, allow air to move freely around the unit and make sure the heater is securely mounted before switching it on.
Always read the instruction manual supplied with your particular tube heater before installation and operation.
Frequently Asked Questions
Can a tube heater be installed vertically?
No. Elixir’s instructions state that the tube heater must be installed horizontally.
Can I switch the heater on before mounting it?
No. The TH0-D instructions specifically state that the heater should not be switched on until it is securely mounted.
Do tube heaters need a guard?
Elixir recommends a heater guard because the surface of the tube heater becomes extremely hot. Guards are available for the tube heater range.
Can tube heaters be used in a greenhouse?
Yes. Elixir lists greenhouses among the applications for its TH0, TH0-B and TH0-D tube heaters.
Are Elixir tube heaters waterproof?
No. The heaters are IP44 rated and water resistant, but the TH0 manual states that they are not waterproof and should not be used where continuous or excessive water spraying may occur.
Can I use a timer with a tube heater?
Elixir offers the TH0-D range with a built-in digital timer for timed operation.
Follow the Instructions
Every gardening product is designed to be used in a specific way. Always read the product label and follow the manufacturer’s instructions before use. Correct preparation, application and timing help ensure the best possible results while promoting safe and responsible use.
Wear Appropriate PPE
Some products may require suitable personal protective equipment (PPE) during handling or application. Depending on the product, this may include gloves, eye protection or protective clothing. Always check the product label to determine the recommended safety precautions before use.
Application Rates
Using more product than recommended will not usually improve performance and may lead to unnecessary waste or undesirable results. Measure accurately, apply evenly and follow the recommended application rates and guidance provided on the product label.
Rhys Nield
As one of our resident product experts, Rhys has spent the last 2 years helping keen gardeners and growers from within our customer services department. Remember to save this page, or visit the Advice Centre, for the latest tips, articles, and expert knowledge, to help you make your garden the best it can be.



About Elixir Gardens Supplies
For over 35 years Elixir Garden Supplies have been providing gardeners with all the essentials they need to achieve growing.
Our online store makes sure that all our customers have access to the information they need to make the right decisions when choosing the products they need for their gardens. We know from experience that gardening means many different things to our customers. Whether you have a balcony, patio, lawn or allotment, Elixir Gardens are proud to supply both amateur and professional gardeners alike.
We regularly use our many years of experience to developed our exclusive formulations in specialist fertilisers. Many of these have stood the test of time and have become firm favourites with amateurs and professionals alike. In fact our knowledge of fertilisers, feeds and garden care is well known within gardening circles. But don’t just take our word for it, why not check out the thousands of fantastic reviews on Trustpilot.
